As most of you know, the universe is pretty old. Even the earth is generally – notwithstanding some of the wackier religious views – understood to be fairly old. In our context, this means two things.
One is that there are lots of old electrons out there so we figured we’d gather some up to help make the rally car go. The other is that a couple extra weeks of car build really aren’t a big deal, right?
We have been working on the car, we swear. However, there were a whole bunch of reasons why we had some delays. Some are family type things, getting sick, going to weddings and etc but one was a series of repairs required when *someone* decided when off-roading that “To the left there’s a rocky bottom; not sure what is on the right” meant “Hey lets go see what interesting things are on the right!” and sank their Jeep. Picture is below; perhaps not unsurprisingly some repairs were needed after this.
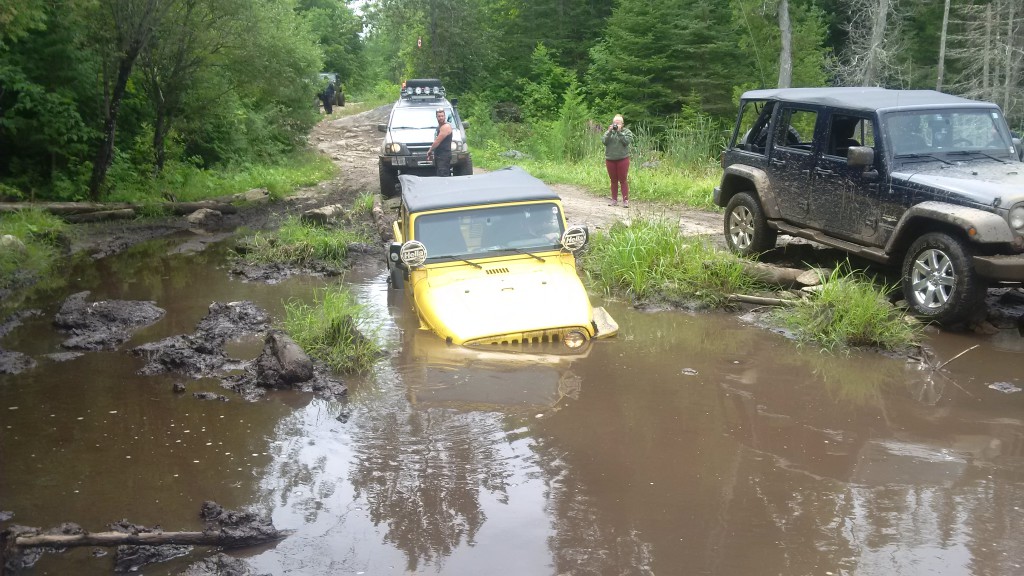
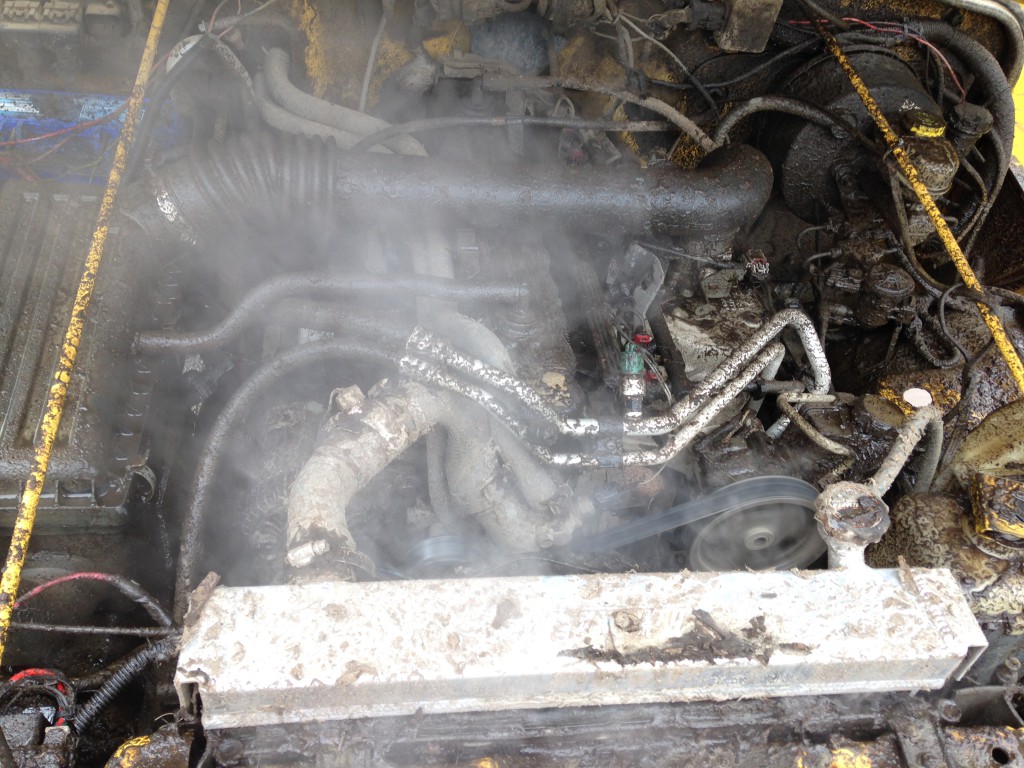
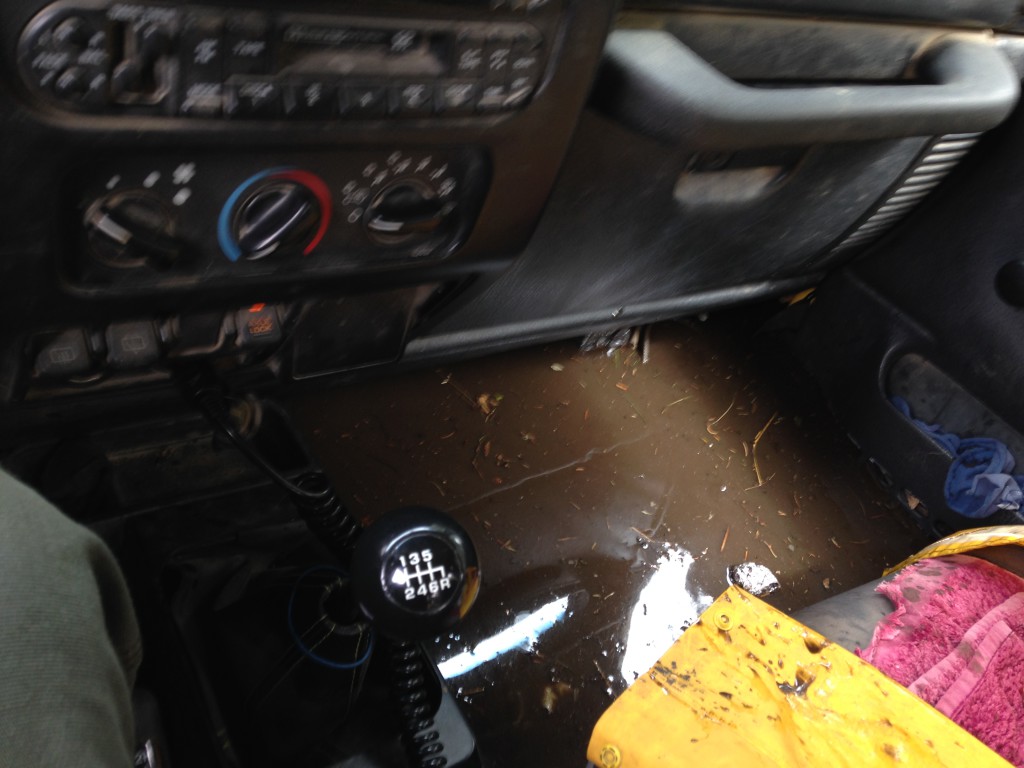
Those repairs included: new clutch, starter, both front calipers, fan relay, and three separate radiator and condenser clean-outs. Plus some interior cleanup, but it needed that before. And to be honest the clutch, starter, and all the brake calipers have all failed once already (the calipers once locking to the point where a tow was required) so this is more like regular maintenance. Considering exactly how into the muddy water it was, this is actually pretty good.
Anyhow, on with the story. We have been focusing on two areas of the car lately: electrical (which we need to make it start) and brakes (which we need once it starts to make it stop). Electrical is a world of mystery to your author but it seems to involve a lot of what I am told is shrink wrapping but looks like good old fashioned opium smoking, so taking a lesson from Nancy Regan some of us just said no and focused on brakes. (Just kidding – we hated Nancy Regan, Tipper Gore, and all the rest of them. A Mind is a Terrible Thing to Taste, kids. Just say Yo to drugs!).
So what we have left to do is some more electrical fiddly bits so the electrons go the right way (or whatever) and the car will start and run. Apparently that is really close. We have the mechanical systems required to provide fuel, air, and should we get moving, steering. The wheels should turn. The suspension should suspend. What we still need to do is to put the radiator in (didn’t yet so we had more room to work), test the brakes with some fluid – what do you think the odds are that since we built the entire system from scratch it might leak a bit? – and then fasten down the brake lines and tighten up a couple of bolts. The goal is to have it running this month so we need to set timing and at least get a basic tune into the ECU so we can drive it on a trailer, because then we need to take it to get an exhaust built, skid plates built, belts in, windshield in, some re-enforcing plates added, etc. Seats will go in and doors and fenders will go on when the interior and rad are done. Bumper will go on when we are good and ready. We have some roof vents, a map light and a shift light to install but we did add oil pressure and boost gauges which will sit in a groovy dash filler plate. And we got some misc safety crap, like fire extinguisher brackets (really cool ones too), triangles, etc.
So here are some highlights of our recent work, with thanks as always to Ziggy at RTM and Paul at HSL Rallysport. Paul is the source of the EBC Red Stuff pads we FINALLY got to put on the car as well as the EBC slotted and dimpled rotors, and Ziggy is the source of the rear calipers among many, many other things DSM specific. Paul also supplied the Amsoil fluids which we will eventually put IN the car, and by eventually we mean soon. We will put together a complete list of everything we did/bought and where we got it as well as putting links on our site, stickers on our car, and possibly henna tattoos on our bodies to say thanks, but we’re not doing any of that until we’re done building it – that will take WAY too much time when we should be wrenching.
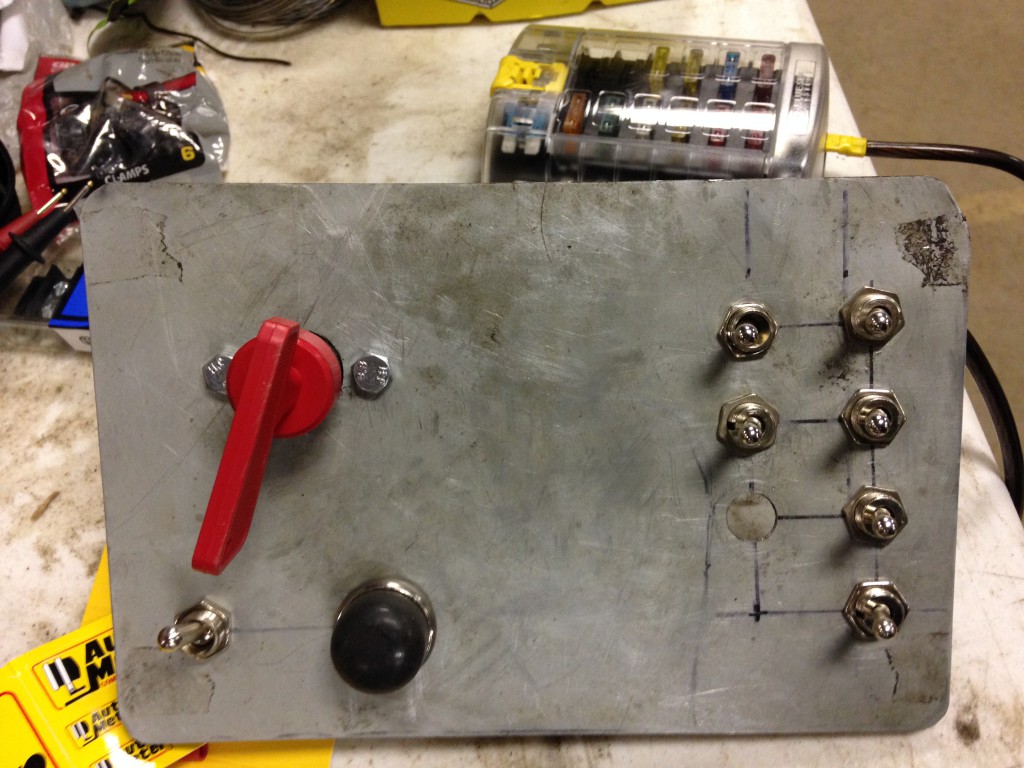
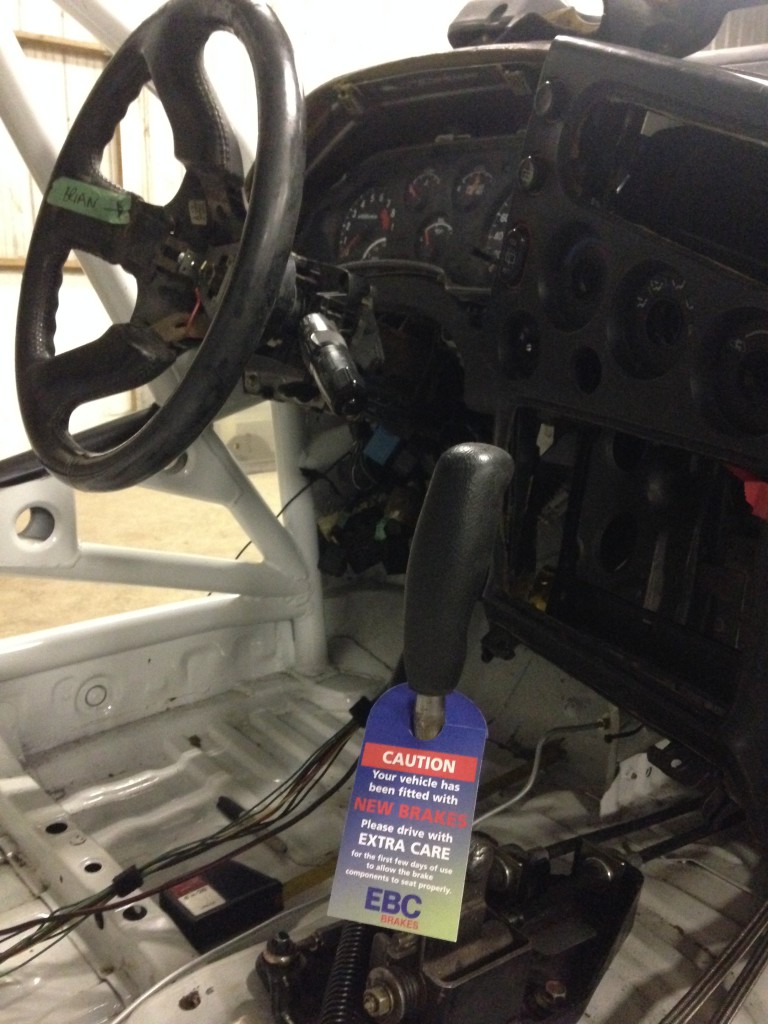
Above is the master kill switch, ignition switch, push button starter, and switches for the secondary fan, fuel pump (mostly important for when we have a dual pump setup), and rally lights. Behind that is what to our eyes is a super cool fusebox.
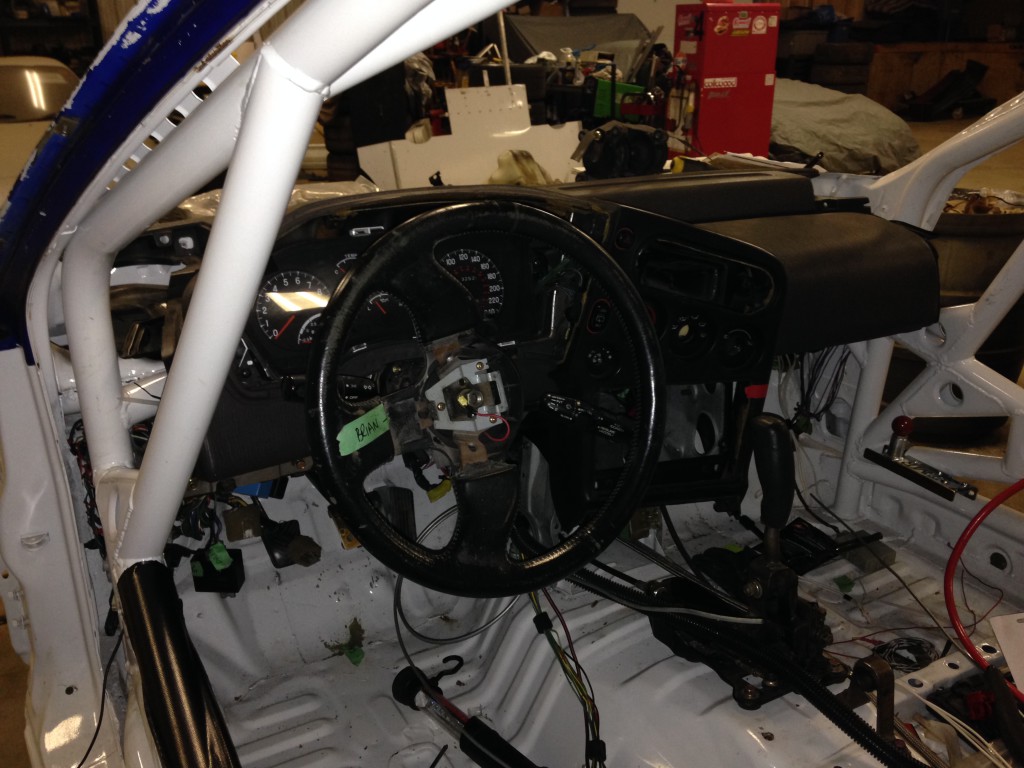
Also, the dash is in, as is the steering wheel. From all accounts the dash was a pain in the ass.
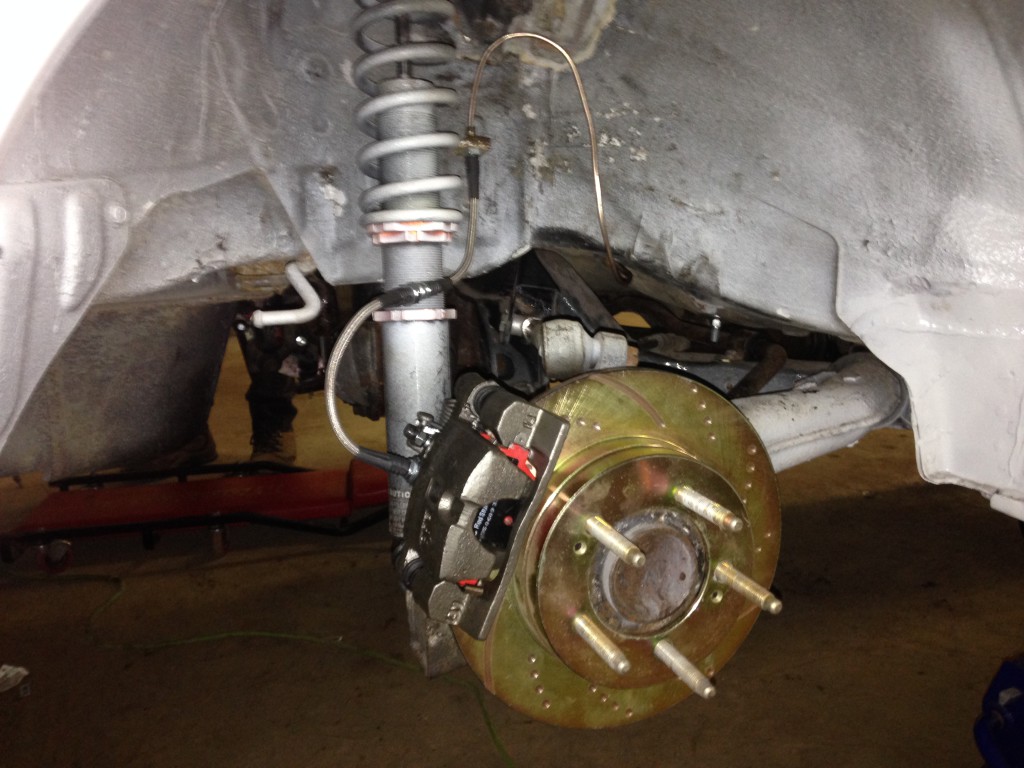
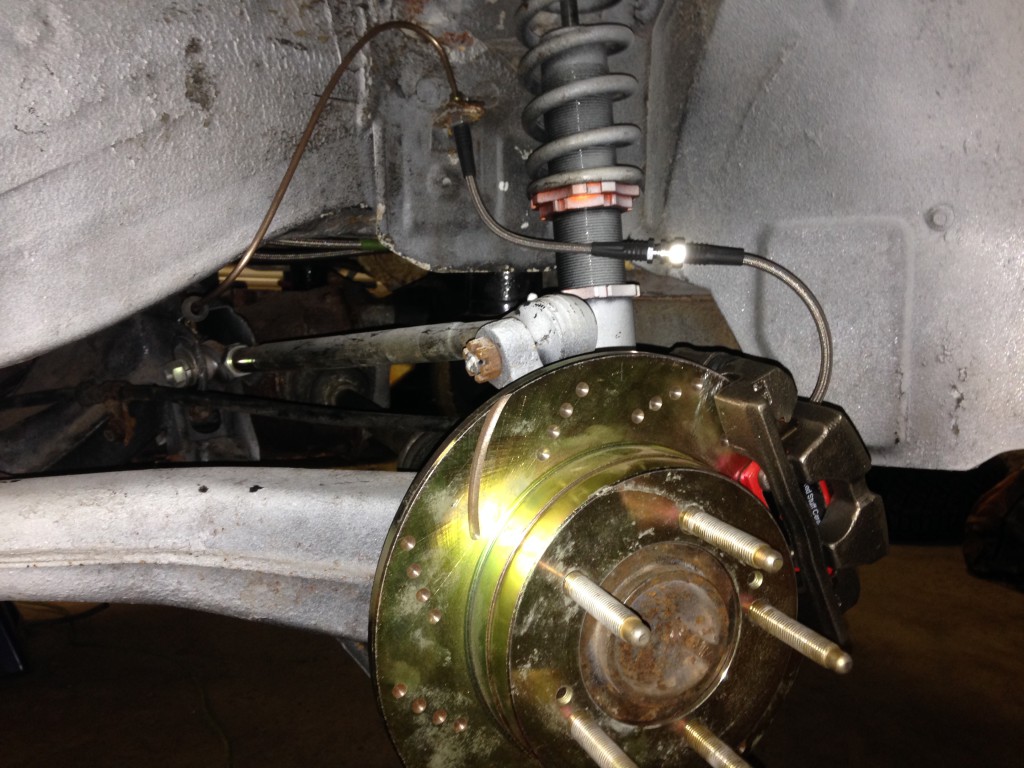 The rear pads are also a pain to get in until you figure out where the anti-vibration (aka anti-falling out) clips go. Pretty sharp brake lines though, huh? And rotors? Ignore the horrible over-spray, but surprisingly enough no, we did NOT paint it ourselves.
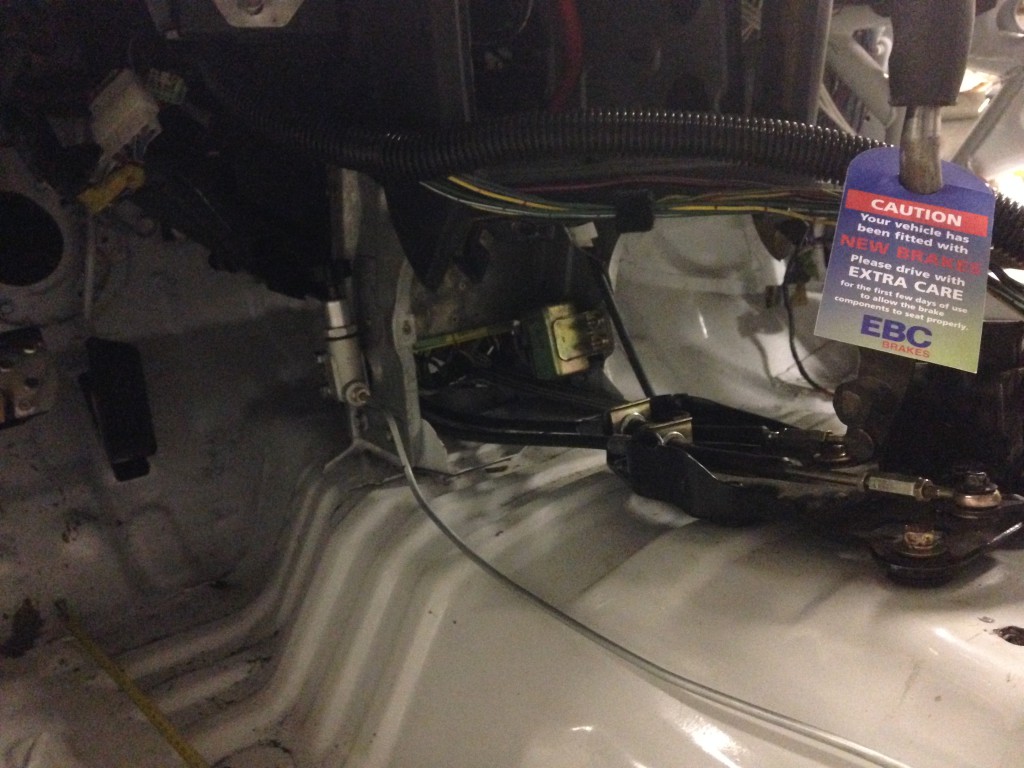
That’s the bias controller in the above picture, plus some electrical business. We’ll wrap that line brake and then fasten it down shortly. Probably fasten the electrical down also.
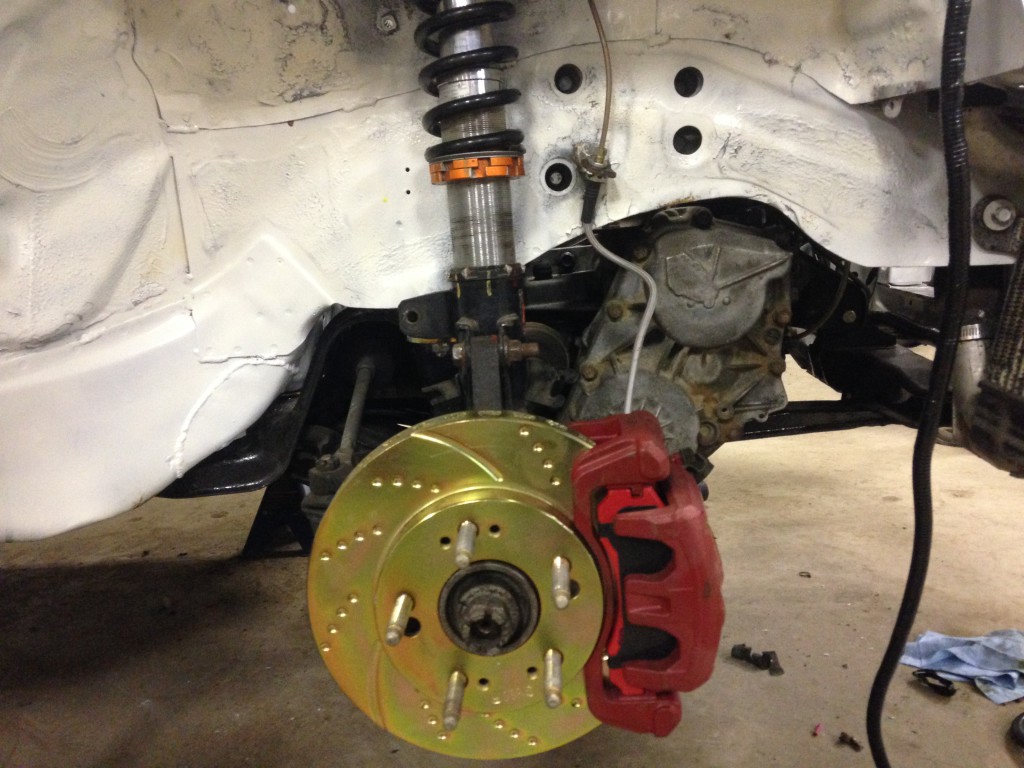
Need to tuck that braided line in the guide. Nice big front brakes though!
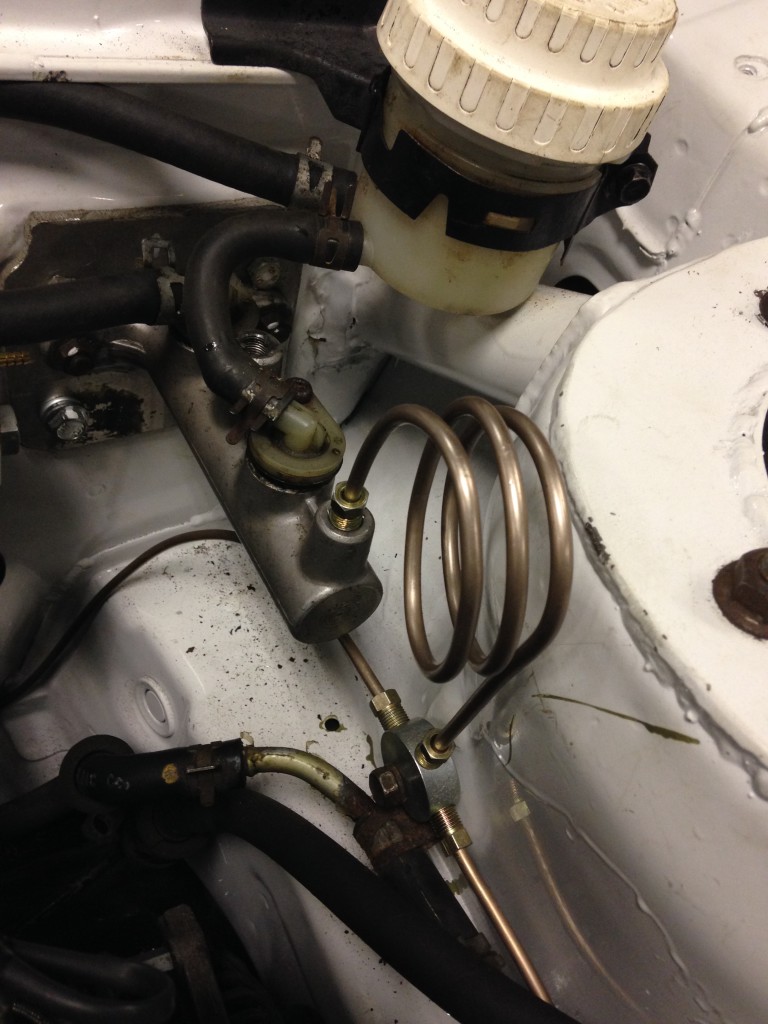
This is before the rear lines went in but you get a good view of the front T and the now un-boosted master. The lines from the master go to a front T and a rear T (which is inside the cabin at the rear) so if we lose a line we lose the brakes at that end of the car. Normally you cross them so if you lose a line you lose one front and one rear but we went this route so we would at least have predictable breaking should a line go. Driving it un-boosted should be interesting even with the shift in the pivot point as mentioned in previous posts.
We hope to have some exciting updates in the next few weeks as we prepare for Tall Pines 2014, so fingers crossed that you’ll be able to come out and cheer for us! Or mock us. Whatever.