Remember those little things we mentioned way back in June? Well, despite some effort there still seem to be more of them. We’re into summer vacation/holiday fun time and the car build delays that creates but we’re getting through them…just perhaps not as quickly as we might.
What we have for you is a selection of the little things that we have accomplished. If after reading you are thinking ‘huh, so what, I could do all that in an hour’ then we invite you up at any time to come spin some wrenches at Casa de Sputnik, and we will supply the beer. And if you are thinking ‘what kind of a hobby is this, anyhow’ then we’ll point out that eventually we plan to race the damn thing, and specifically at Tall Pines 2014. Which is in 2.5 months. And that will be really fun.
So, without further ado, some small things and the explanation as to why they are a small big deal.
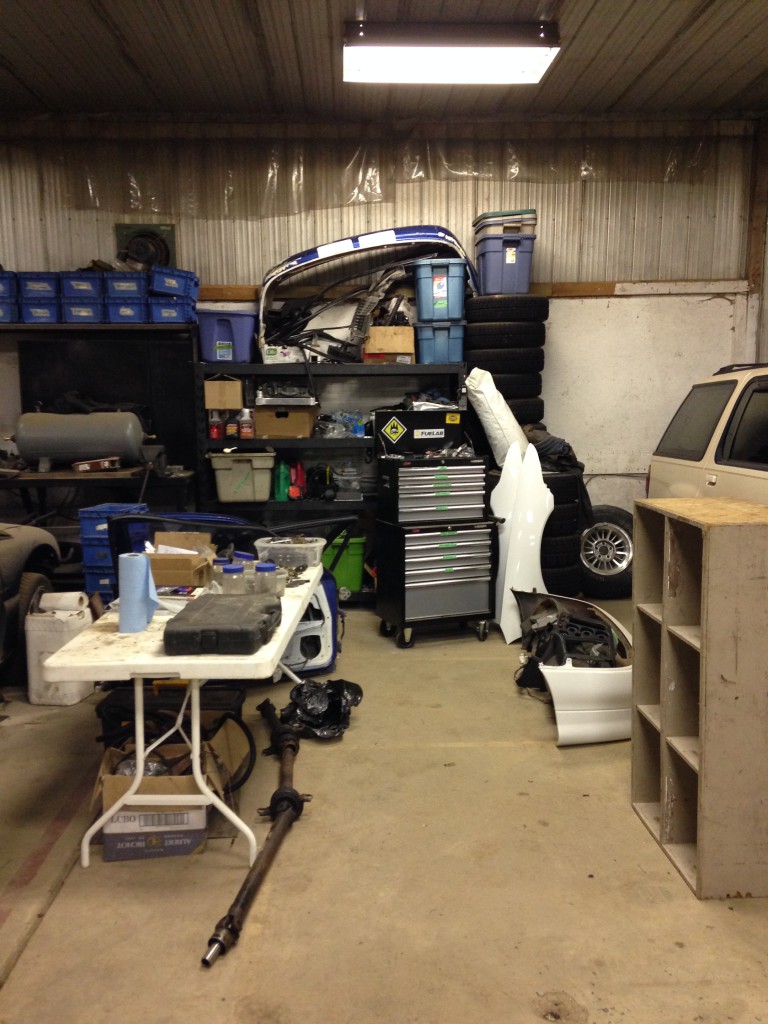
We organized the shop space. (Yes, this is the ‘after’ picture). Note labels on the tool box drawers even! And all the tools that were in/around/under/on the car were put away at least once. Plus we put the self-tapping screws in one peanut butter jar, the washers in another, the nuts in another, the seat belt anchors in another, the wheel lug nuts in another, and left all the bolts on the table so we can find them. You don’t want to go too crazy.
 In case you missed it via Facebook we broke the shop vice installing u-joints for the prop shaft. Yeah, we know it makes no sense. How could a vice like this break doing u-joints?
 Moving right along…
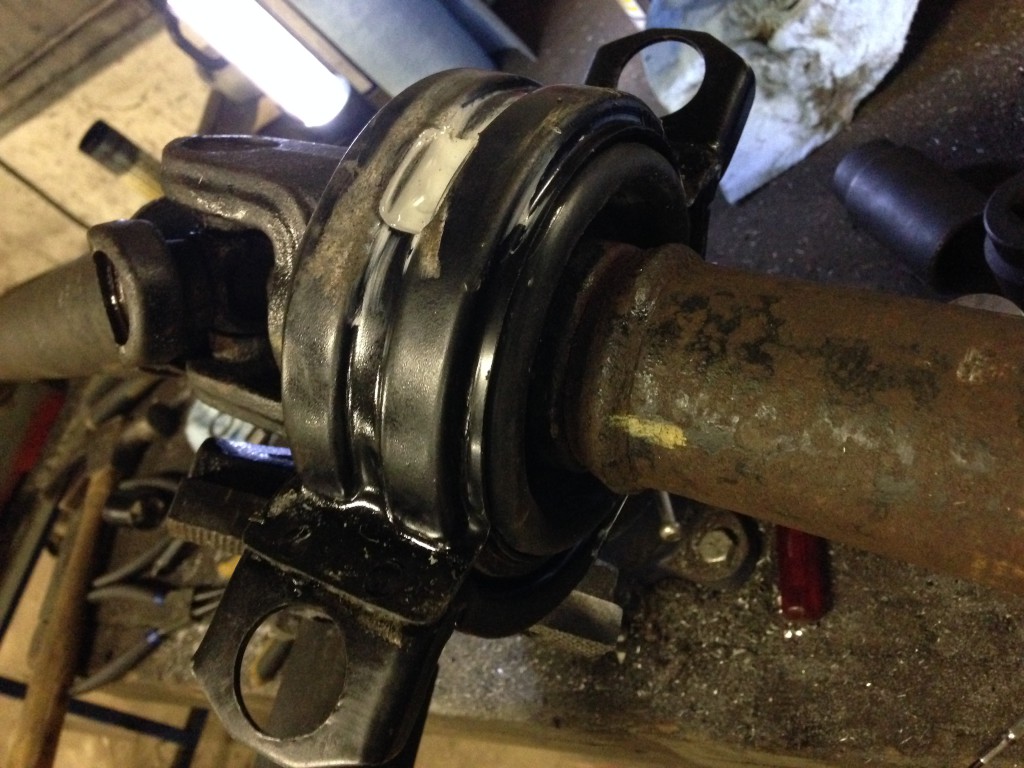
Above is a hanger bearing that is filled with urethane to keep it from self-destructing too badly. We had to buy new ones, then fill them, then take the prop shaft apart to put the new ones on. That is a pain. In fact, the whole prop shaft has been a pain. We tried to buy a new cool aluminum one, waited 6 weeks and got a total run-around, then got our money back. We bought a used one from Don, then when we broke the one u-joint (and the vice) we realized that the u-joints on both ends needed doing also. Here’s what the broken u-joint looked like. 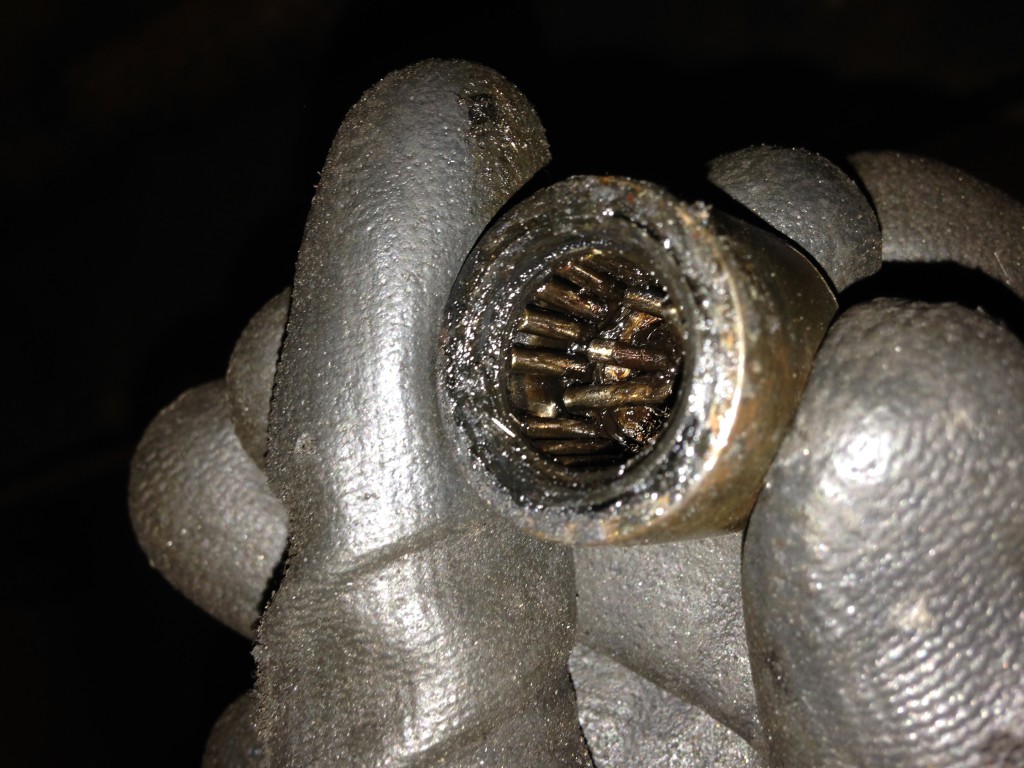
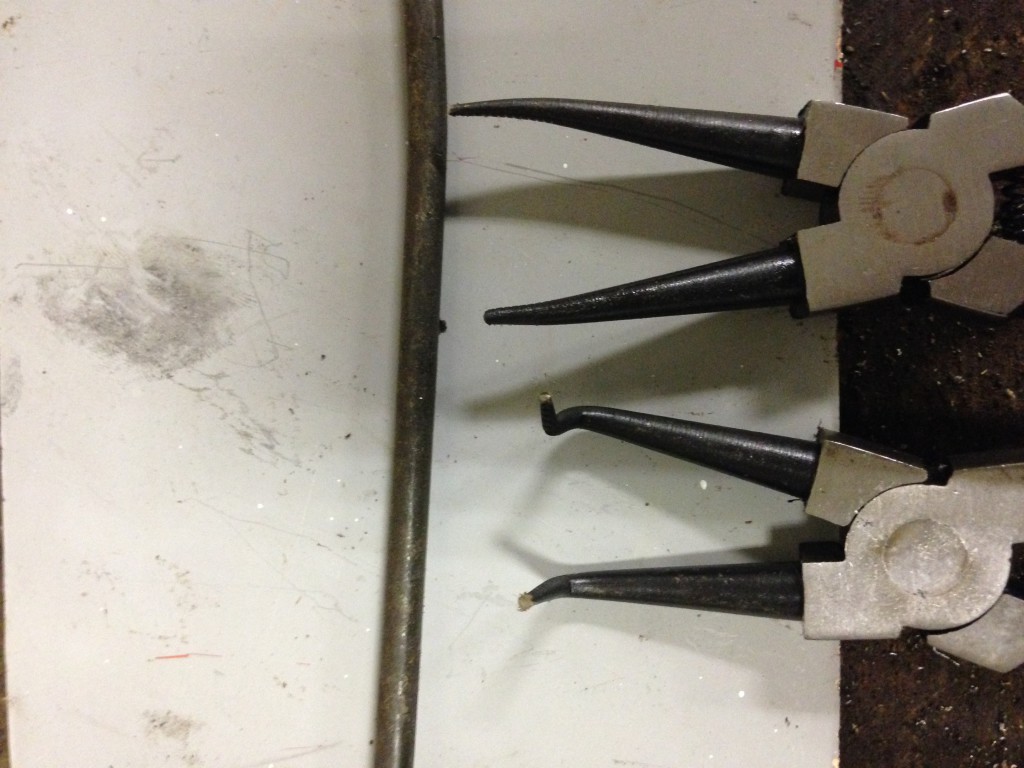
While we were breaking that and the vice we also broke the circlip pliers that we bought to replace the other two sets that had already broken. Yes, this is the third (all different) set. Any suggestions where to shop for set 4 are welcome.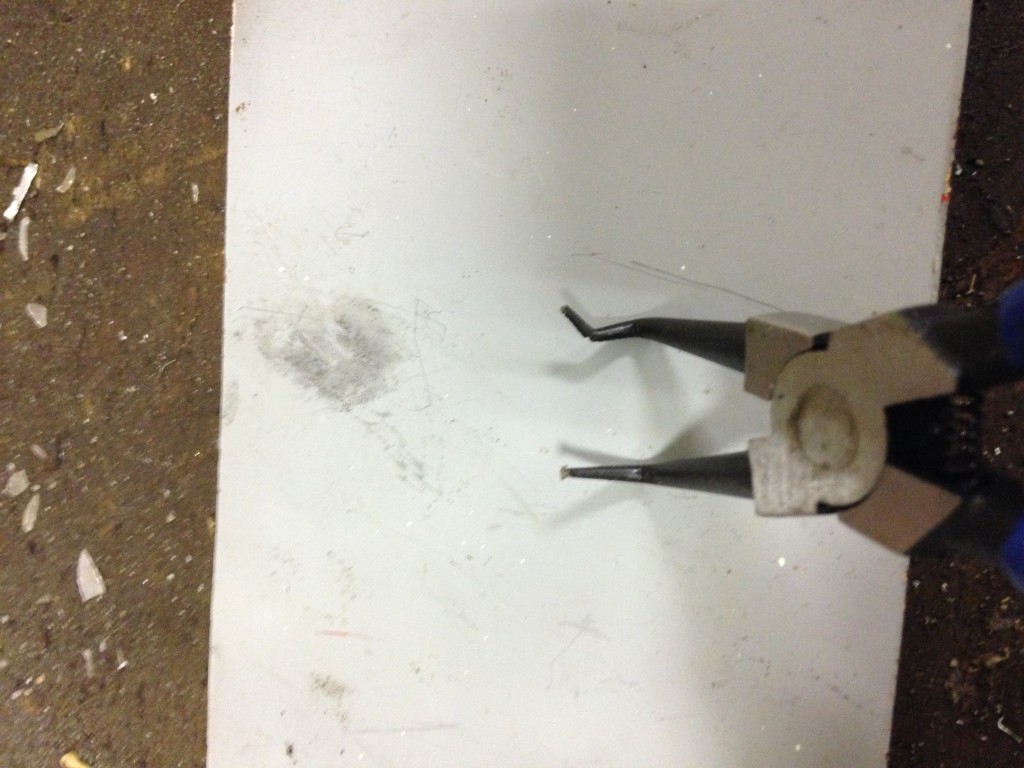
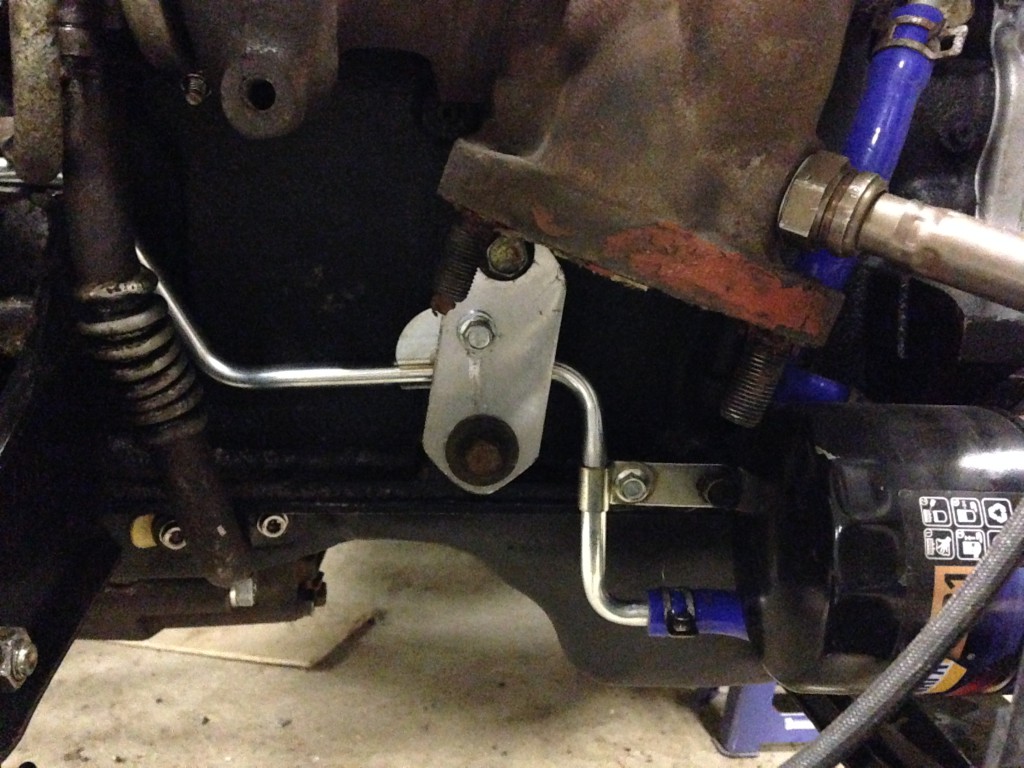
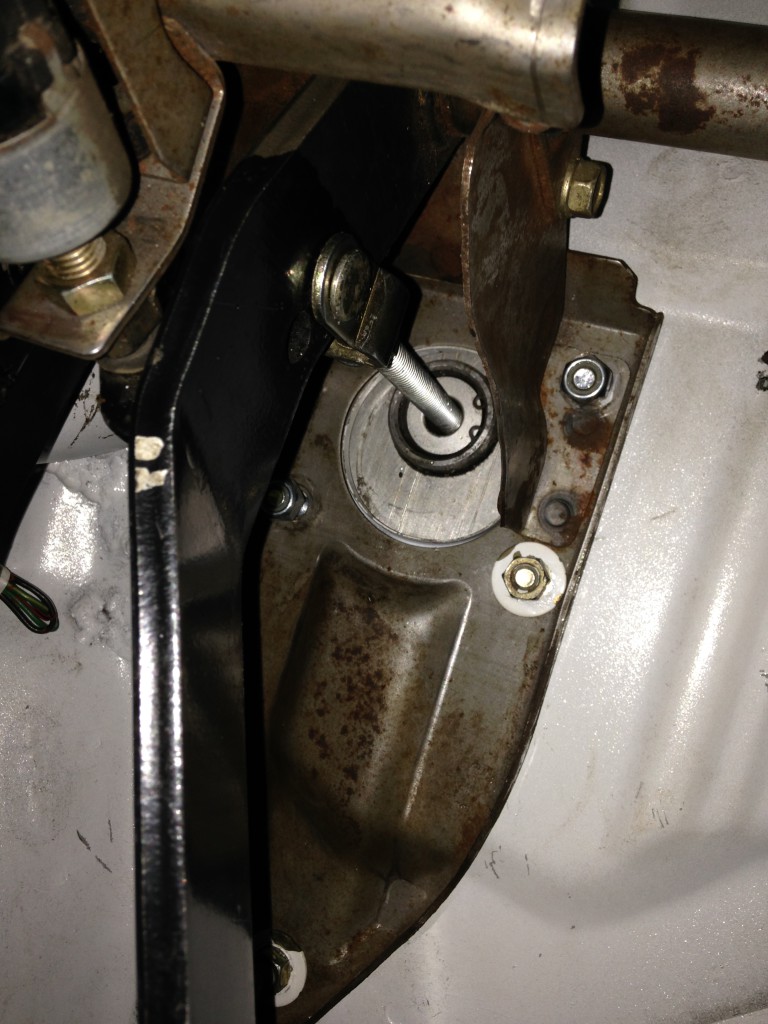
Aha, now we come to some successes! This is the turbo oil line mount. We had to make it, because we lost it or something. When we made it only the top and middle bolts were drilled correctly. Because we made it. So we took it off, drilled it properly for a second bolt, found the second bolt that actually fit in the spot – and appropriate washer – and attached it. Yes, this was actually a thing that we had to do.
Here’s another little beauty. Sure, it’s a fuse box. However, the bottom bolt was snapped off in the tapped hole so we had 2 bolts on there. But we knew it was wrong. So we took it off, drilled out the broken bolt, cleaned up the threads, and put washers on all the little plastic bits when we put it back together using all three bolts, once we found a third and some washers. Again, this was actually a thing that we had to do that took time.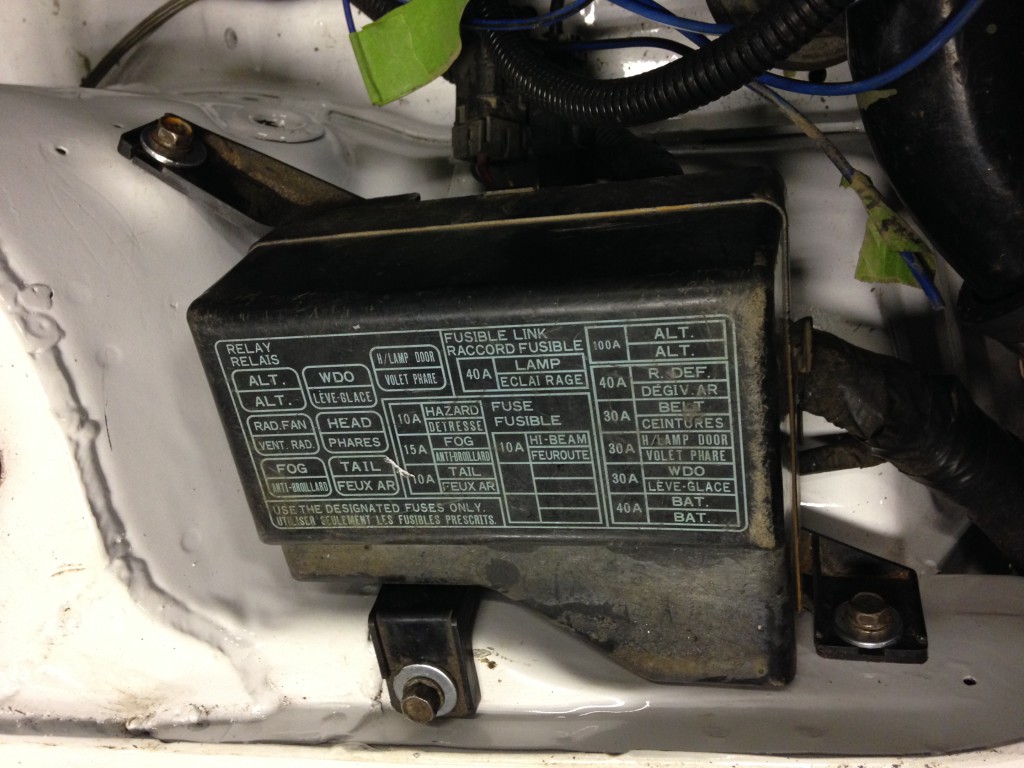
Here’s another great example of something that looks like nothing. This should be a whole separate post, in fact. Or a short novel.
We have removed the power brakes/vacuum assist. That means the brake master cylinder now sits on the firewall. That means it needed a mounting plate with a hole drilled in it but moved higher than stock so that the rod that activates the master cylinder is a completely different size. THAT is so that when we take the pedal box out, drill a new hole in the brake pedal arm, and attach the rod to the pedal arm we can move that slightly higher up also. This will, in theory, give us a bit more leverage when actuating the now-manual brakes. We did all that and here’s the proof. (And of course no single part of this – from getting threaded rod from TSC that will thread easily onto metric brake clips to figuring out the angle while you hang upside down under where the dash would be – is a common street mod so it’s not like we could look up ‘how to DSM remove power brakes’ on youtube and just do that). Thanks to Ryan from Rally/Race for assuring us this would work and also for the pictures of his setup so we could see what the finished product looked like!
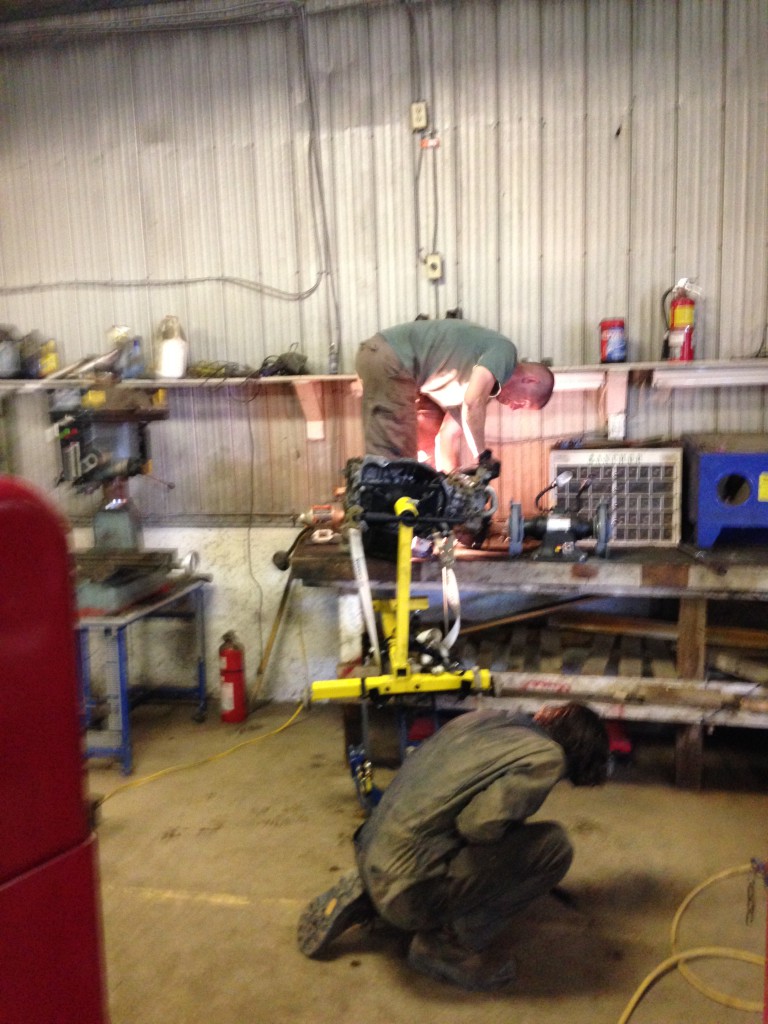
This is a partly-rebuilt prop shaft. The part you can see is done. The rest needed more beer to finish. We are clearly working with the backup vice, also, but you’ll recognize that hanger bearing.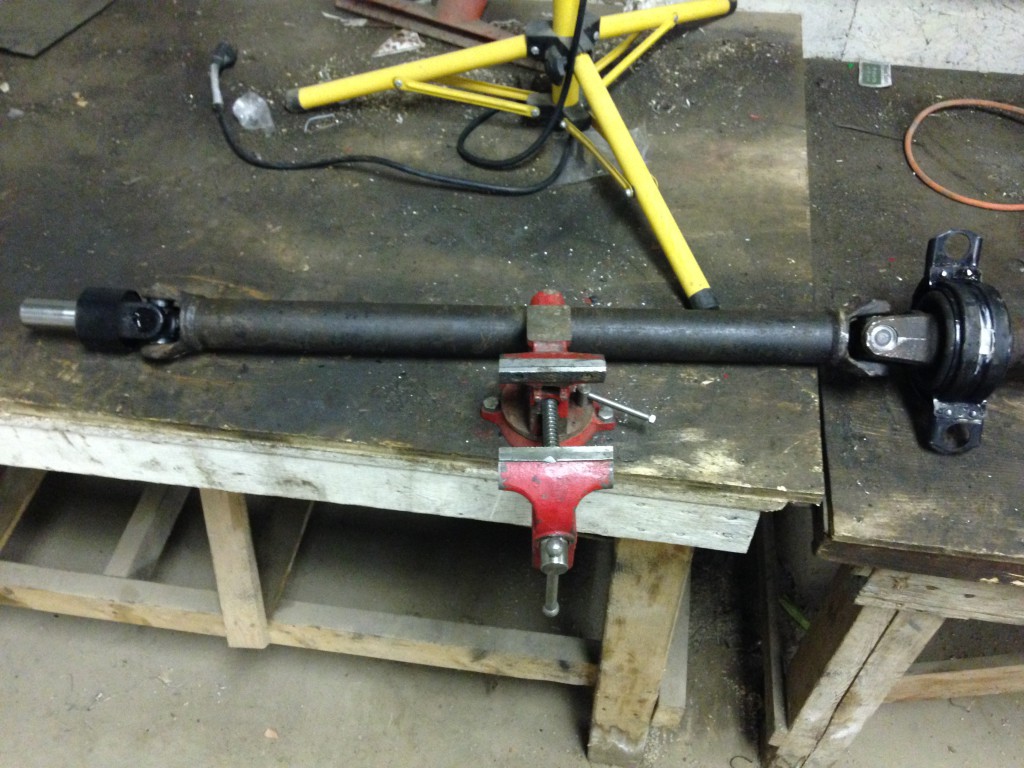
This is the fuel pump cover. Under that is where the go juice lives.
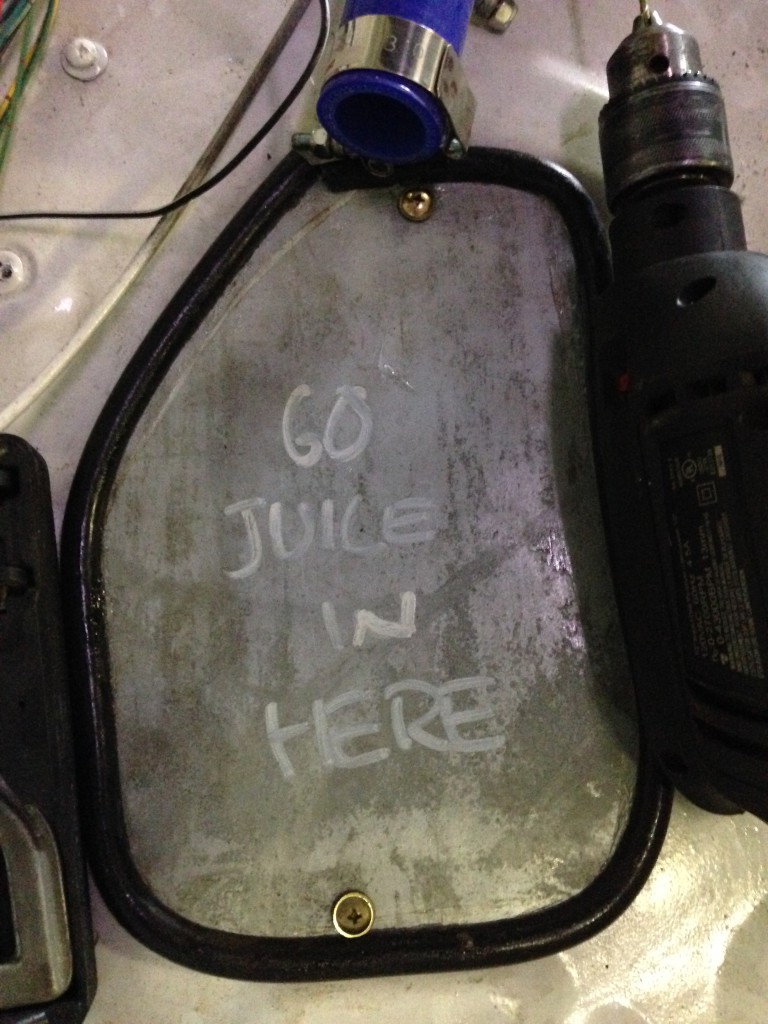
And in fact THIS is what is under that cover!
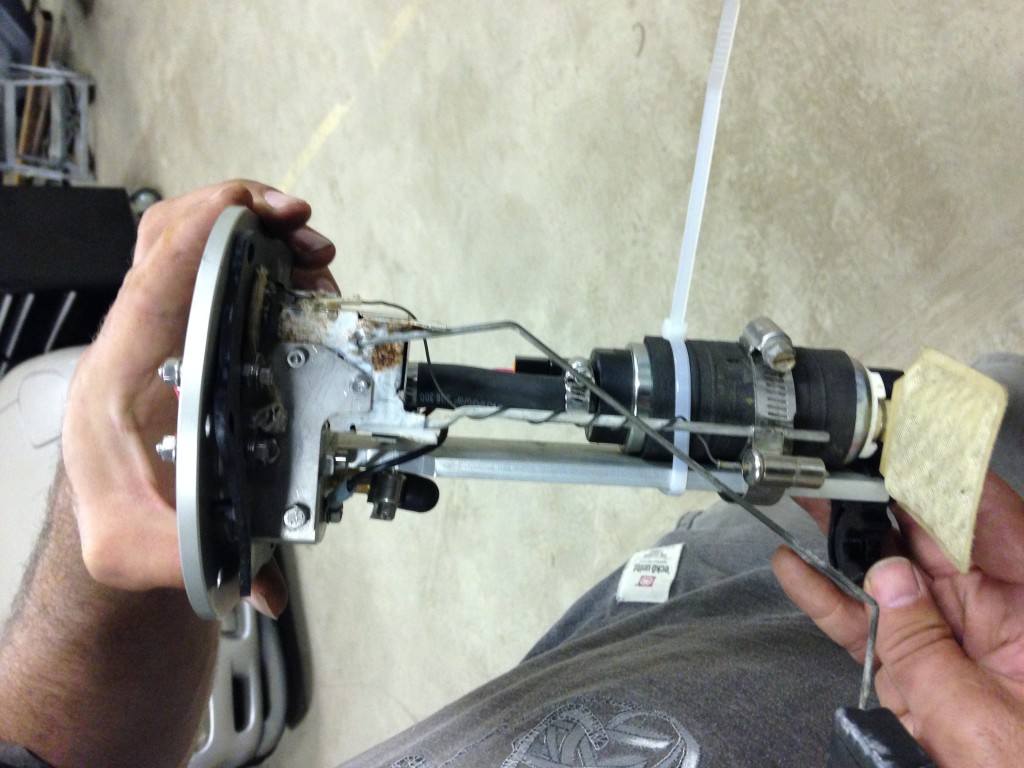
We had to purchase a Walbro fuel pump to install in it, of course, so thanks to the DSM forums we were able to do that. Here’s what it looks like in place.
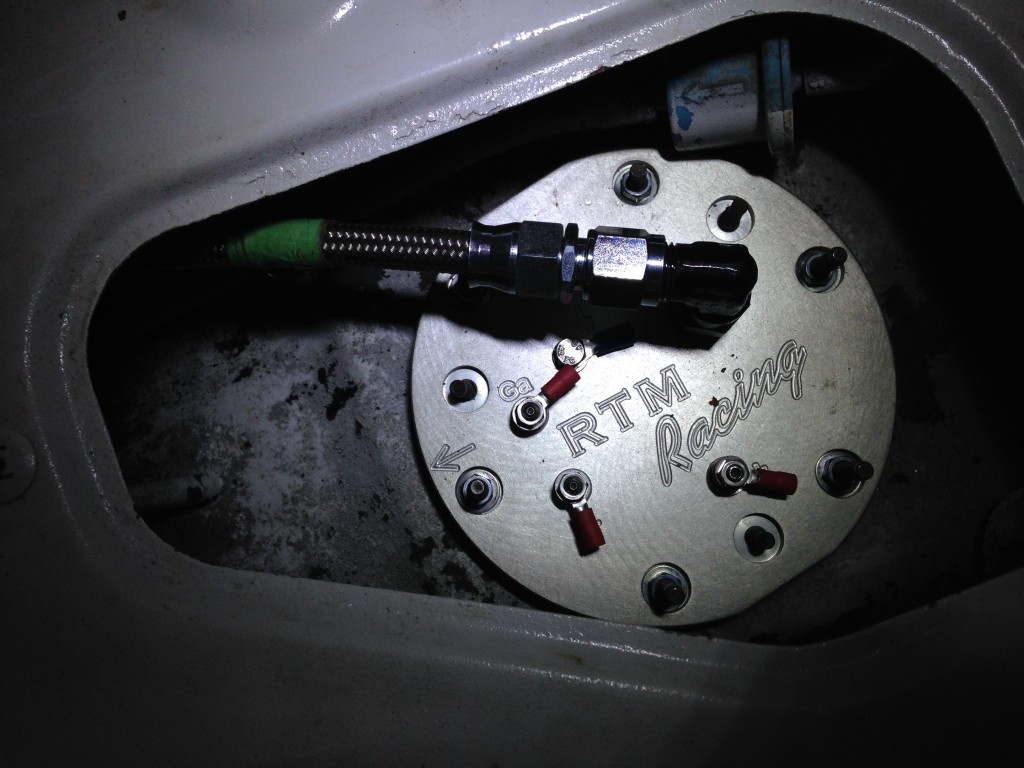
Pretty swanky, huh?! We never thought a fuel sender unit could be so damn exciting. Good job RTM!
Next up was another thing that isn’t in the manual. We have re-located our alternator from where god and Mitsubishi intended it – where it will also bake in the exhaust heat – to the other side of the motor. There’s a kit for that, and thanks to the Interwebz and DSM forums we got one. However, the fit is a bit tight. Ok, you could barely get a piece of paper between the end of the alternator shaft and the frame rail. So we really didn’t want to but we took the alternator off the motor, had our friend who is next to an alternator/starter shop take it in and ask them to put a shoulder bolt on it to save us 1⁄4 inch, then we got it back and ground the now-exposed end of the shaft off, then re-installed it. You bet it was a pain in the ass.

Here’s an example of working smarter, not harder. We have yet another broken bolt; this one for one of the e-brake mounts in the cabin. How do we fix that?
We make it someone elses problem!
(Seriously, he’s a genius with these things).
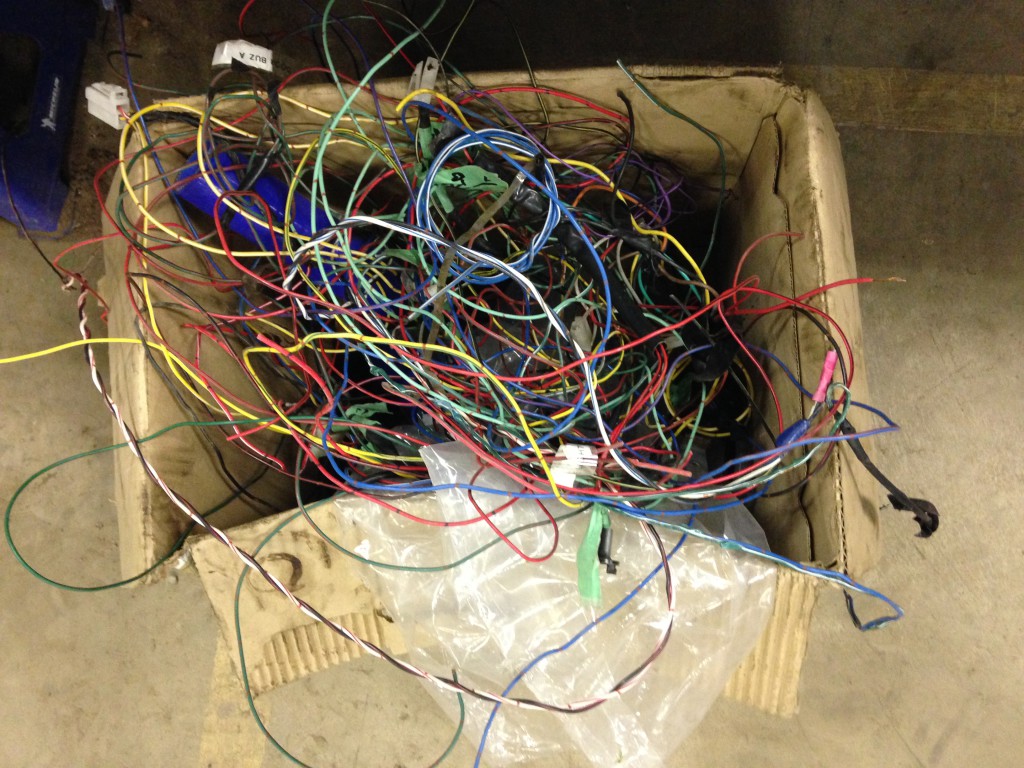
This is a small example of the wiring we’ve pulled out so far, and this isn’t all of it.
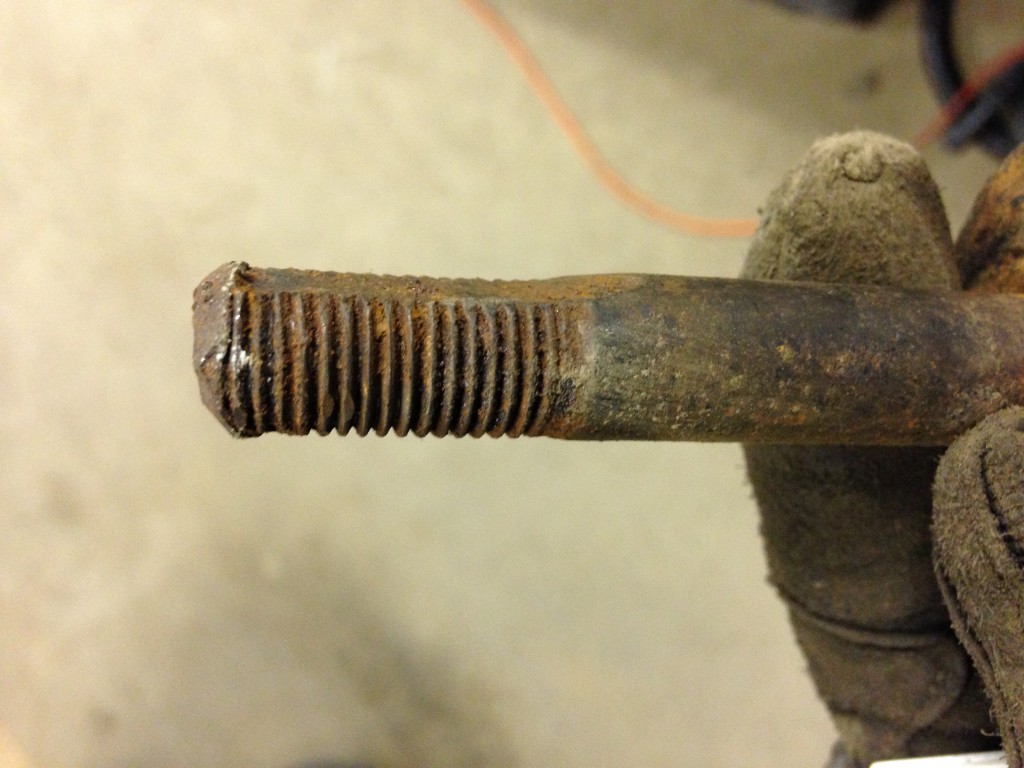
You may think we were being excessive but here’s an example.

This is one of many, many bad bolts.
 These are the brake parts still to be installed.
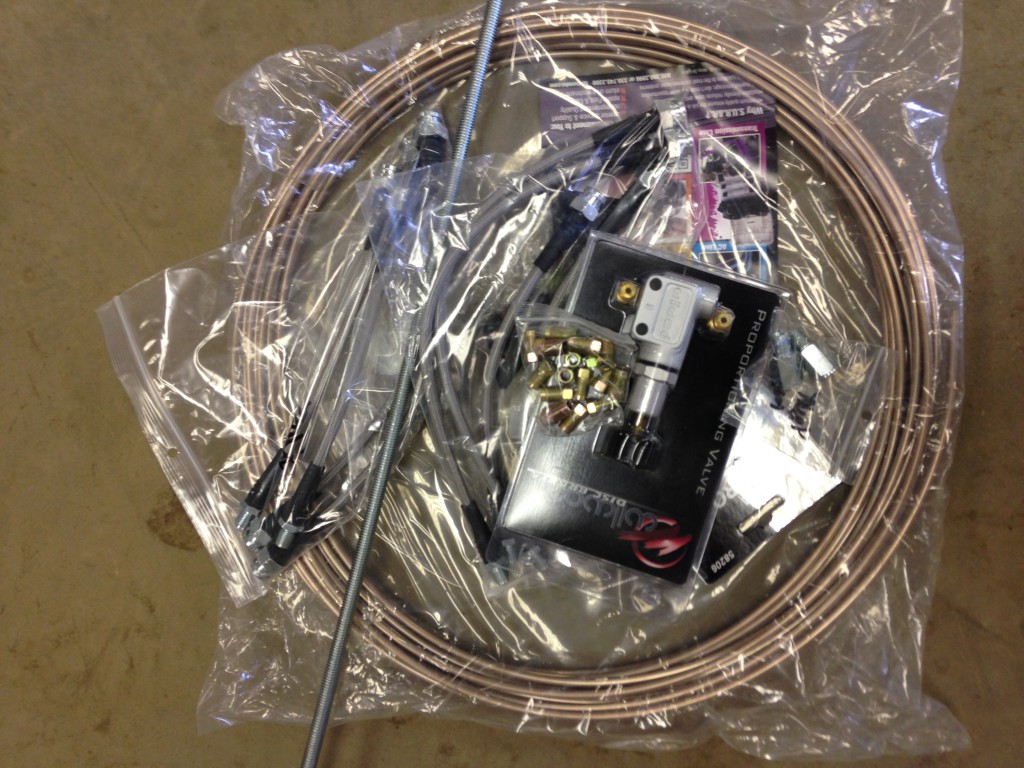
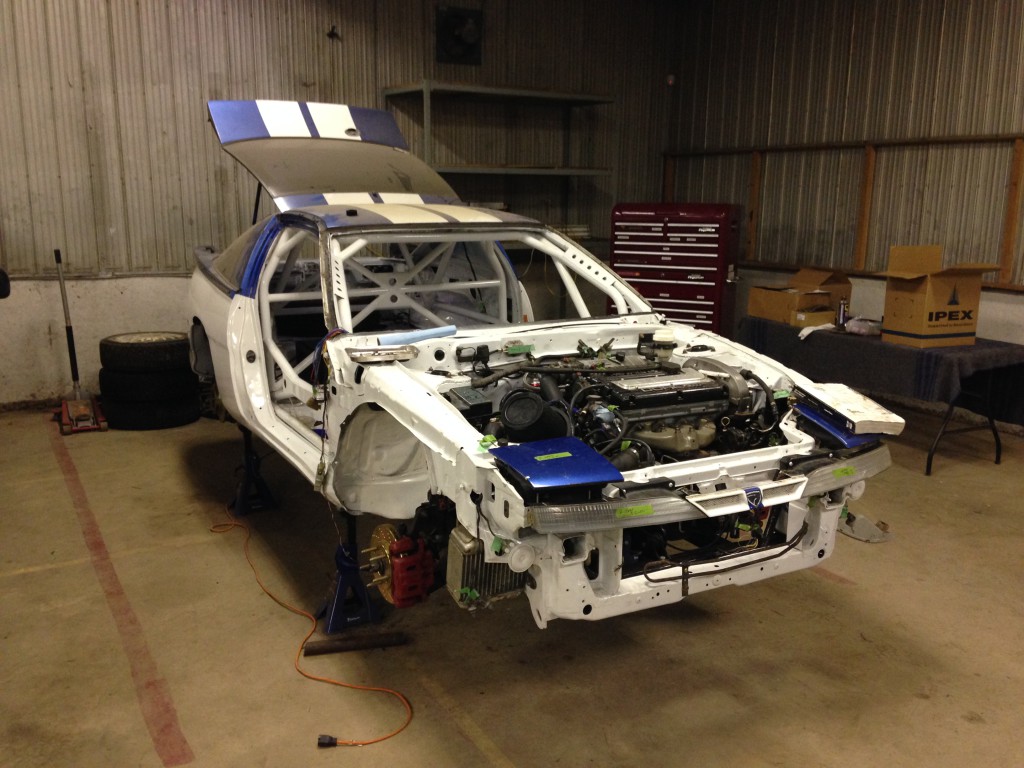
We also torqued/tightened everything we could find, put some bolts into some other spots that were missing bolts, drilled out other bolts, found things, and generally got ourselves ship-shape. Hard to take a picture of that, though. However, here’s the car in the cleaned up space, eagerly awaiting more time and money! That’s probably close enough.